The photographs in this article are from an S2, however
the calipers and techniques are identical to an S1.
Thanks to Richard Gilmour for the photographs.
WARNING : Unless you are confident you know what
you are doing, have the correct tools, and understand the implications
of making a mistake don't work on the braking system of your car.
No Liability can be accepted should you make a
mistake whilst working on your brake system.
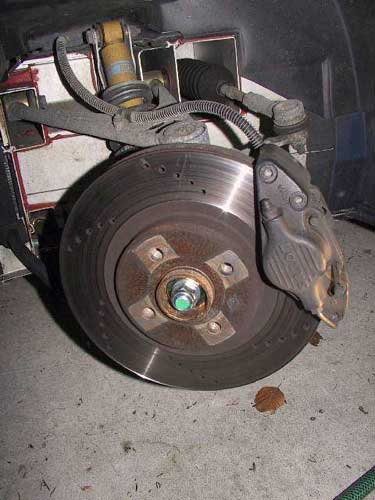
Front
Jack up the side of the car using the central jacking
point, having first loosened the wheel nuts and turn the steering to
ease access to the caliper, remove the wheel.
Ensure your safety by making sure the car cannot
fall and that you are not relying on a hydraulic jack to hold the weight
of the car.
Remove the R clips from the inside of the two pad retaining
pins (A in the picture below)
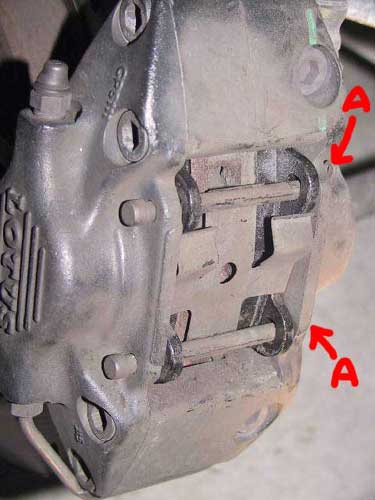
withdraw the pad retaining pins (B in the picure below)
from the caliper, be carefull to hold onto the pad anti-rattle spring
(and note it's orientation) otherwise it will spring off and disappear
;-).
Now remove the pads by pulling them in the direction marked
(A in the picture below)
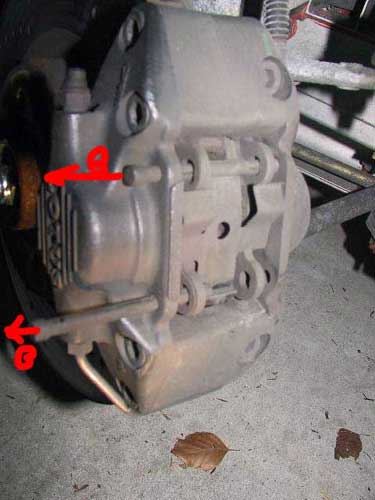
The caliper pistons must now be pushed into the caliper
body, there are two pistons (the inner one marked B in the picture above).
It should be possible to push the pistons into the caliper
by hard finger pressure alone, however this takes some grunt and persistence.
It may be necessary to improvise something to push the pistons but you
must be very carefull to push the piston squarely into the piston bore
otherwise you can damage the piston or bore or both. When fully pushed
in the pistons will be flush with the caliper inner face.
Insert the new pads in the same orientation as the old
pads, replace the pad retaining pins and R clips and replace the wheel.
That sounded fast, but re-assembly is the simple reversal of disassembly
at this point, if you are all done make sure to close the brake fluid
reservoir.
Some points of note, You MUST pump the brake pedal until
it is firm BEFORE moving the car, this allows the caliper pistons to
self adjust to the correct position with the new pads.
Carefully smearing coopergrease on the piston facing side
of the pad (NOT the surface touching the disk) can help stop squealing.
However this is one of those religious debates which some people agree
with and some violently disagree with, whatever works for you is fine,
I always use coppergrease and my brakes never squeal.
DOUBLE CHECK everything, TWICE,
the brakes are very simple, but also absolutely critical, your and others
lives depend on them, if you are unsure about what you are doing, leave
it to a specialist. Better broke than dead.
Jack up the side of the car using the central jacking
point, having first loosened the wheel nuts and remove the wheel. You
must ensure the handbrake is off, so alternative measures must be taken
to prevent the car from moving whilst jacked.
Ensure your safety by making sure the car cannot
fall and that you are not relying on a hydraulic jack to hold the weight
of the car.
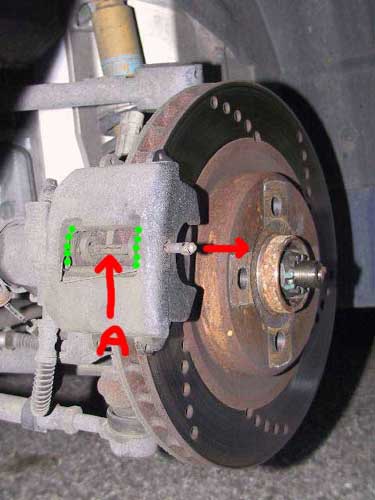
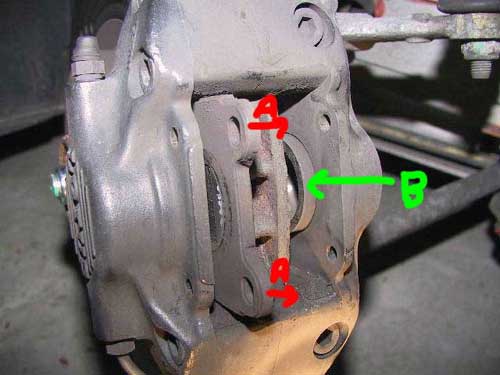
Note the positions of the pad anti-rattle springs, there
are two of them fitted (the green dots on the picture above show their
locations), Remove the pad retaining pin (A in the picture above) from
the caiper by using an appropriately sized punch to push it ou of the
caliper in the direction shown. Make sure the ani-rattle springs don't
disappear into hyperspace when you remove the retaining pin.
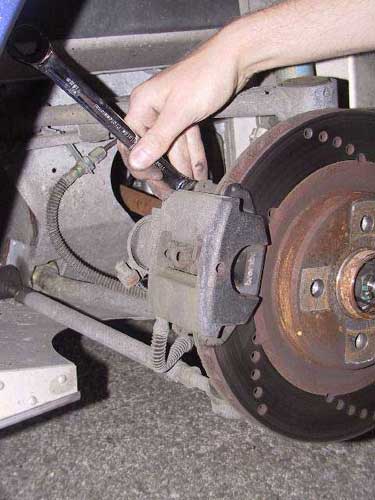
Remove the caliper upper retaining bolt from the back
of the caliper, this will ultimately allow the caliper to rotate about
the lower caliper retaining bolt (have a look behind the caliper to
see both before you start)
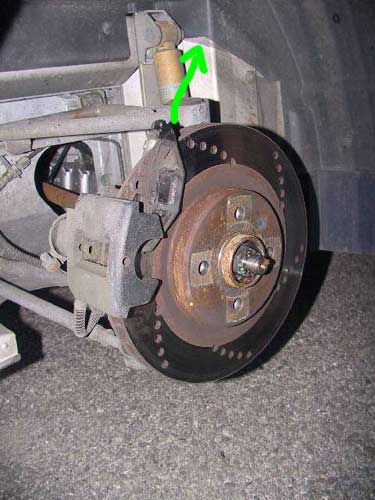
Remove the outer pad in the direction shown above, it
may be necessary to use a light punch to move the pad initially.
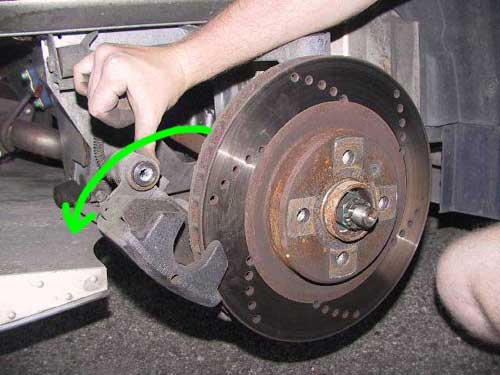
Rotate the caliper towards the rear of the car after removing
the inner pad to gain access to the single piston. Be carefull not to
damage the handbrake cable at this point, so not force the caliper.
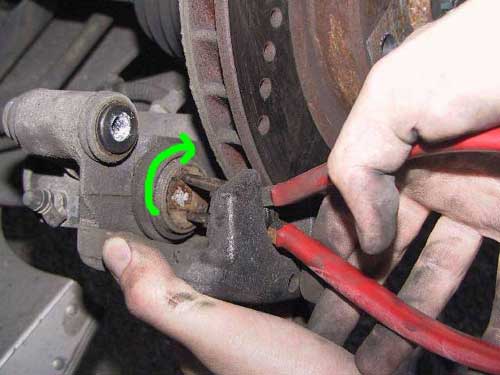
To push the piston back into the caliper you must turn
it as it is being pushed, if you do not do this the piston will not
push back into the caliper. Again the piston will be flush with the
caliper inner face when it is fully retracted.
Be Carefull not to damage the piston seals if you use
long nosed pliers as shown above as they can easily slip and cut the
seal. You may wish to buy a proper piston wind-back tool for this job
if you are not familiar.
Some points of note, You MUST pump the brake pedal until
it is firm BEFORE moving the car, this allows the caliper pistons to
self adjust to the correct position with the new pads. Verify that the
handbrake functions correctly.
Again, as of this point re-assembly is a simple reversal
of disassembly, and coppergrease may or may not be used depending on
your religion,
DOUBLE CHECK everything, TWICE,
the brakes are very simple, but also absolutely critical, your and others
lives depend on them, if you are unsure about what you are doing, leave
it to a specialist. Better broke than dead.
Disclaimer : All information is supplied as a guide only.
No Guarantee as to its reliability can be issued.
You use this information entirely at your own risk.
No Reproduction or Reuse without prior written consent.